Kaltura Express Capture is now available for use and integrated with Canvas. Kaltura Express Capture is an HTML based recording tool that leverages the power of your browser to make recordings using your camera only. This tool is perfect for announcements or an introduction to a discussion. You can find Express Capture in your course “My Media” under the “Add New” button.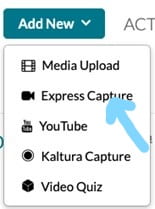
You can find instructions for using Express Capture in the Kaltura Knowledge Center. This tool has been tested in Chrome, Firefox and Microsoft Edge (for P.C.). It is not supported in Safari.
- Select Express Capture from the + Add New drop down menu.
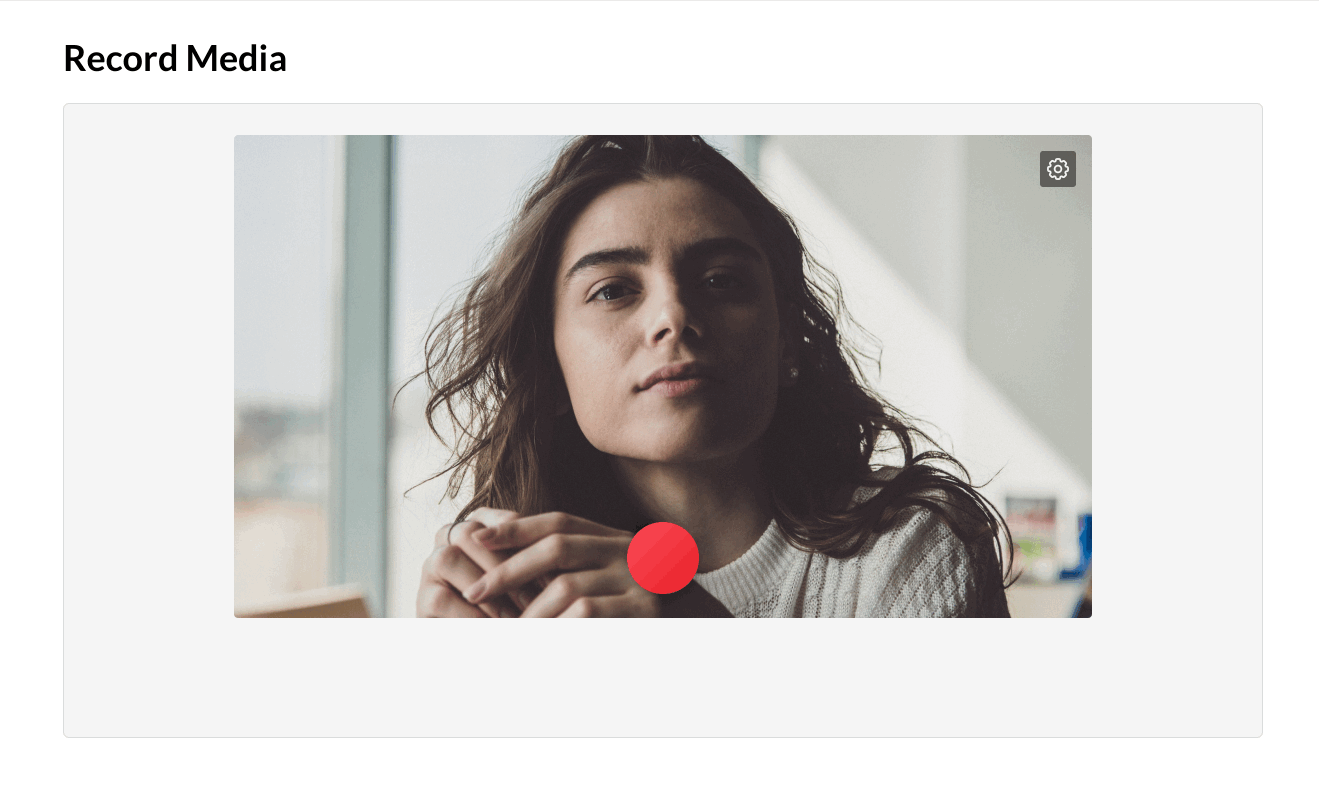
Record Media page is displayed.
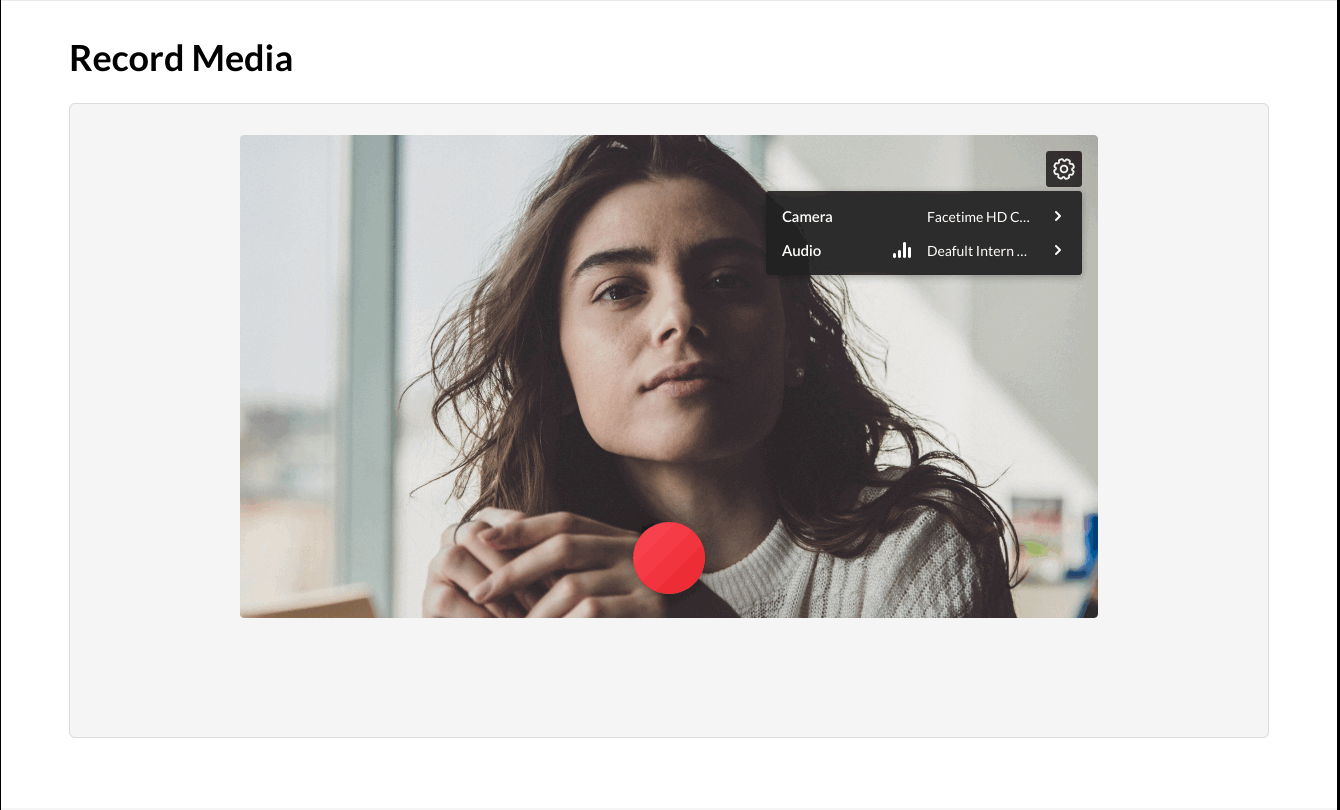
- (Optional) Set the Camera or Audio Settings. The default settings are your personal computer’s webcam and audio device.
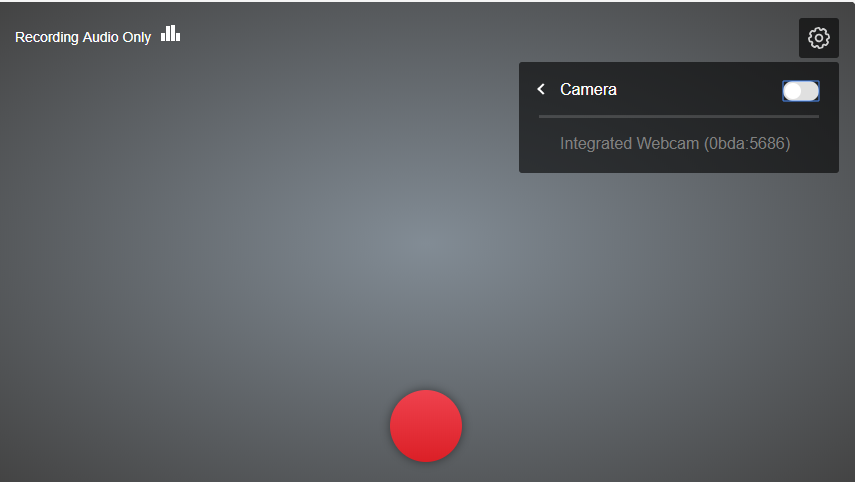
- Click the Settings icon to select the source camera (if you have multiple cameras) or audio device (if you have multiple audio devices) and to turn the camera/audio on/off.
- Click on the arrow next to the camera to display the available cameras and the on/off toggle for the camera.
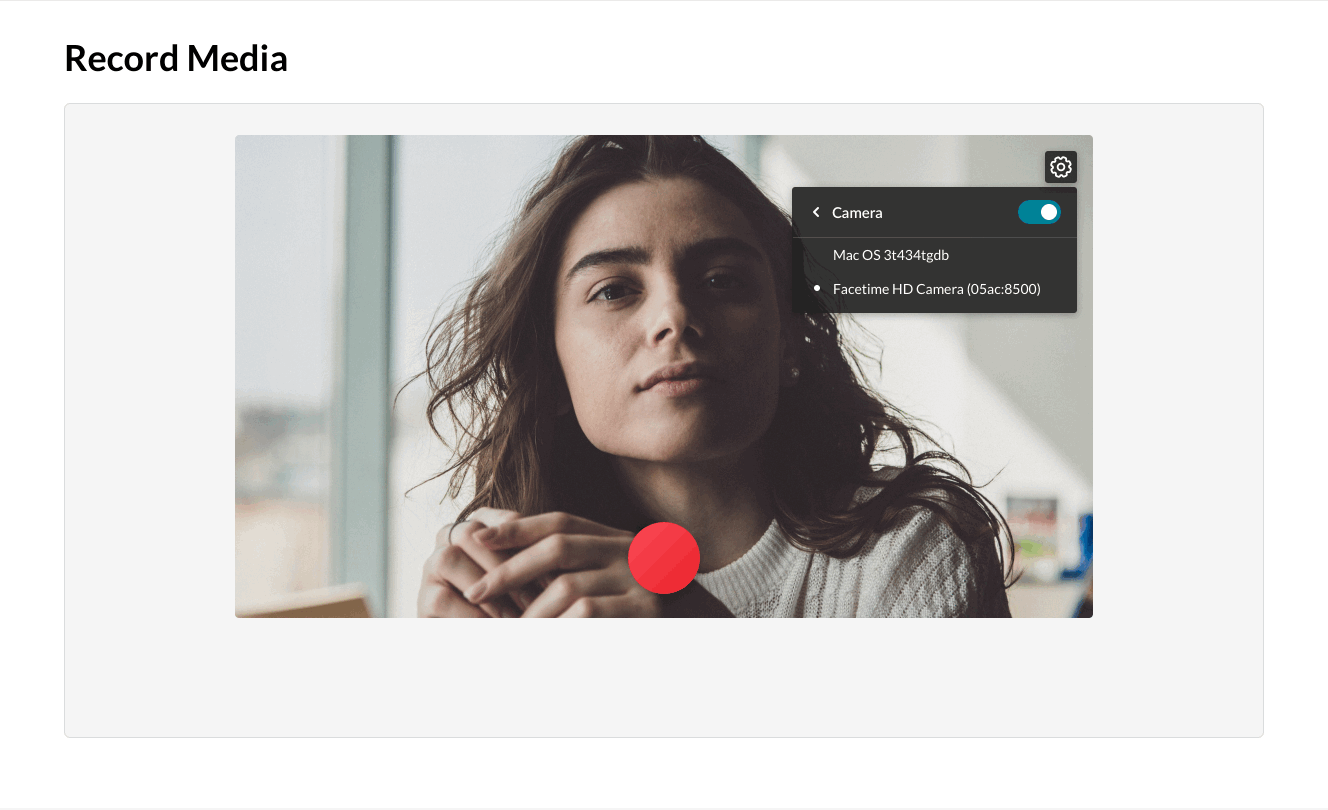
- Select the camera type.
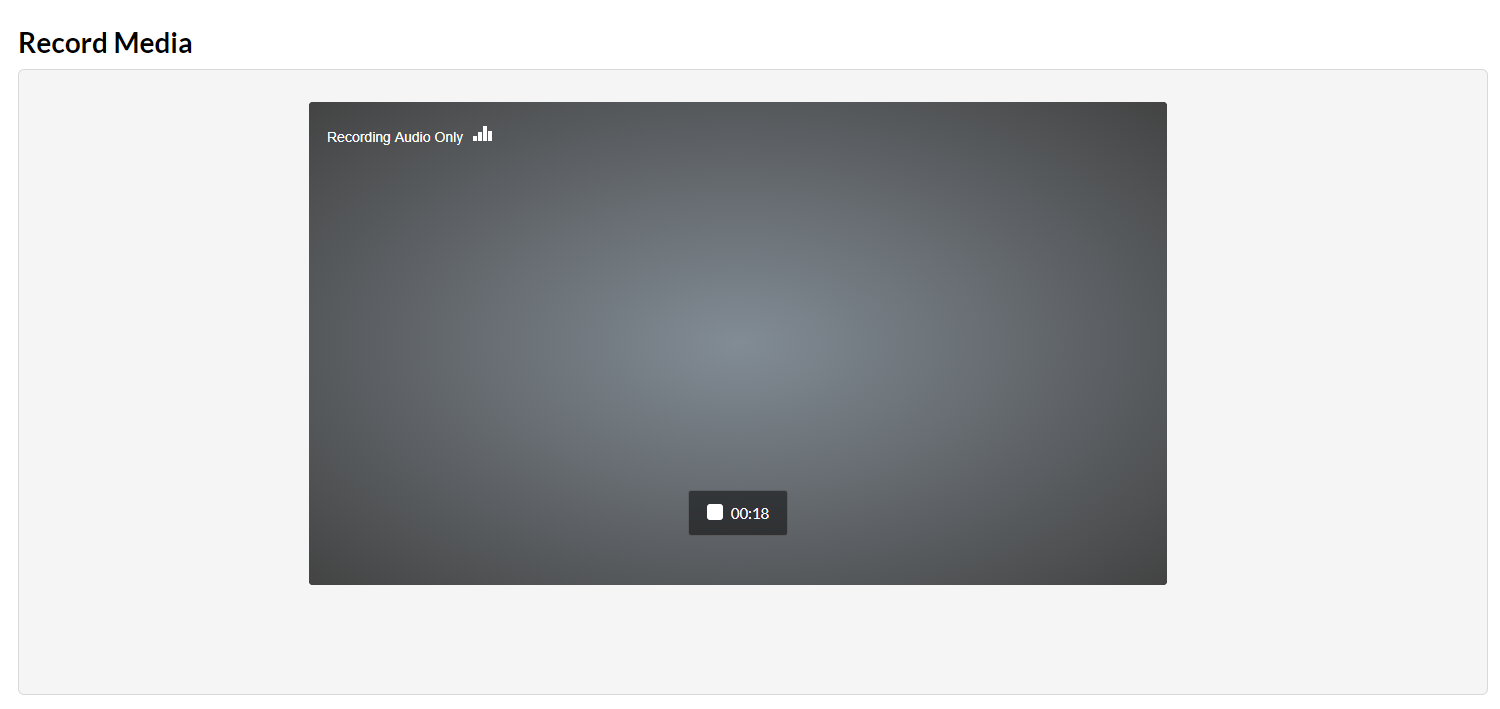
- Toggle the camera off if you want to create an audio only recording.

- The following screen is displayed indicating that you are recording Audio only. Click the red button to start recording.
The audio indicator is displayed while you are recording audio only.
- Toggle the audio off if you want to create a visual only recording.

Both the camera and audio may not be turned off at the same time. - Click the Record button to begin your recording. A three second countdown window is displayed.
- Start Recording.
 A timer is displayed next to the Stop button.
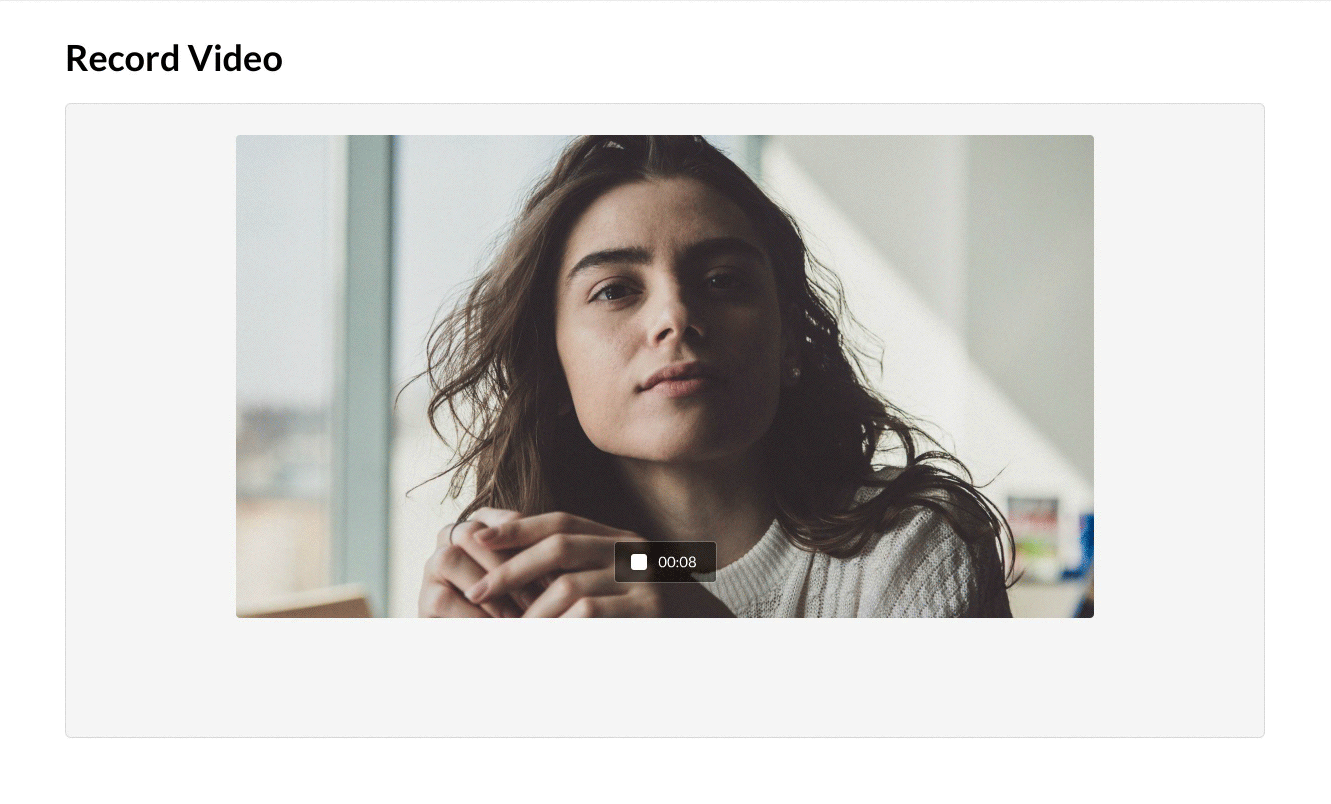
- Click the Stop button to end your recording. The following window is displayed.
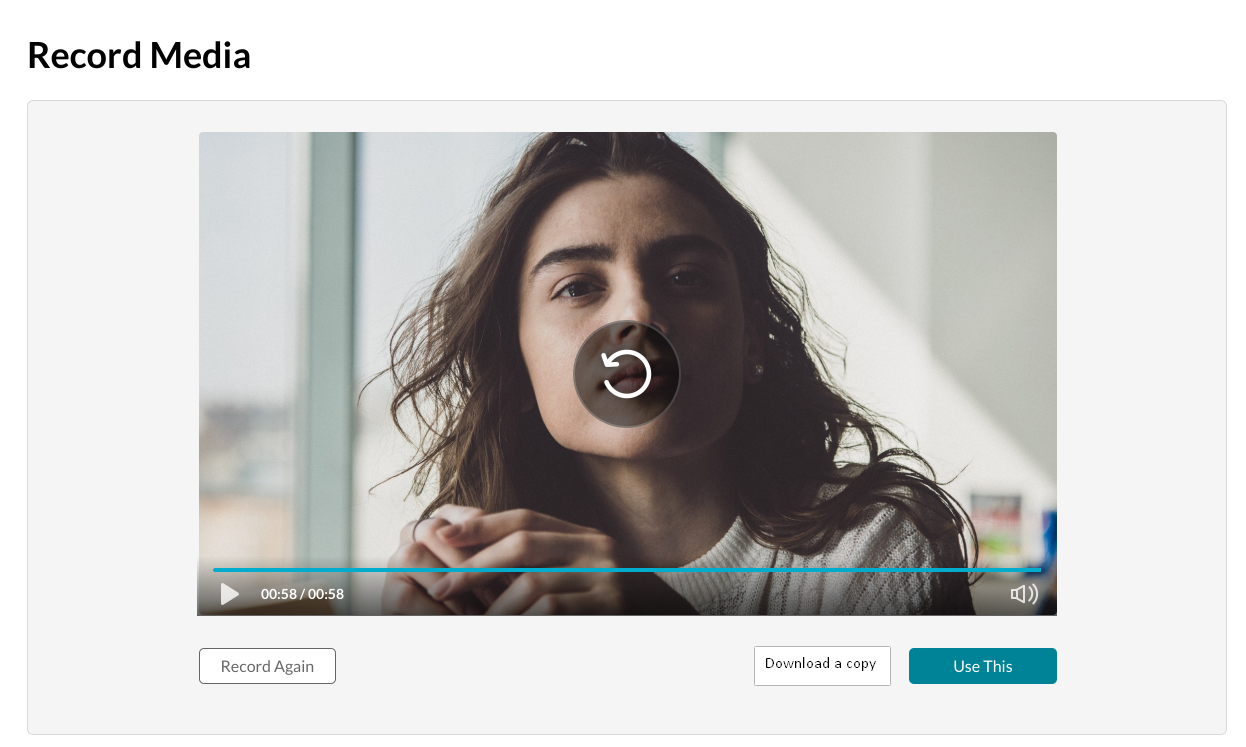
- Choose Record Again to retake the recording or Use This to use the current recording. “Record Again” discards the current recording. You will be reverted to the Record button where you can retake the recording.
- Select Use This when you are satisfied with your recording (after as many retakes as needed), to upload to Kaltura. The Upload window is displayed.
- Select Download a Copy to download a copy locally before you upload your file.
- Click Cancel to cancel the upload.
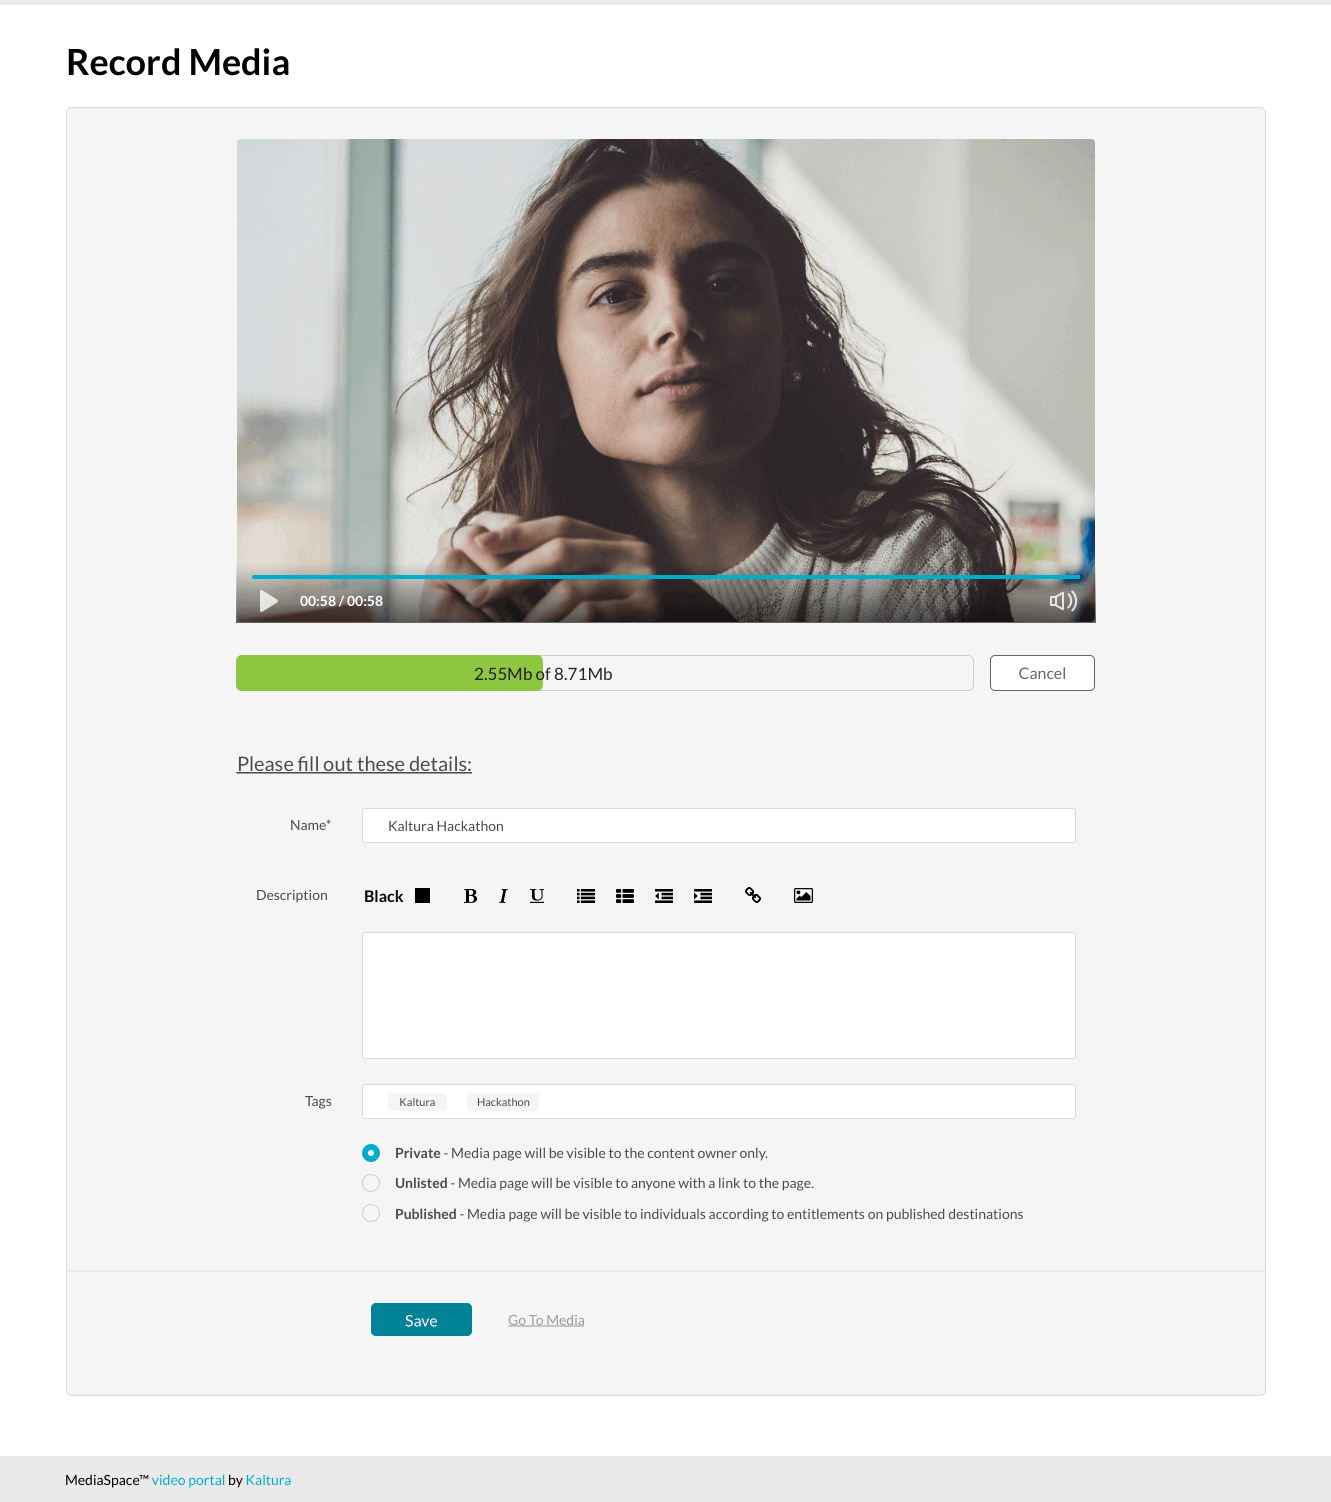
- While the file is uploading, on the Upload Media page you can:
- Enter metadata information about the media and click Save.
- Select the Privacy Settings. When adding new media and editing the metadata, select if the media will be private, unlisted, or automatically published to specific categories and/or channels when the media is ready.
If you click Save before the file is completely uploaded, the media information is saved after the media is uploaded.
17. To view the media page after uploading is complete
- Select My Media from the User drop-down menu.The uploaded file will get a default name and is saved automatically. The name is of the following format:
“Video Recording – July 23, 2018 7:43pm EST” or “Audio Recording – July 23, 2018 7:43pm EST”.